 SkillBamboo

DeepSeek Harness is a coding agent you assemble yourself: you pick the model, and plugins decide what the workspace looks like. With Claude Code, the vendor makes both of those calls for you.
If that trade-off appeals to you, here's how to install DeepSeek Harness and get to a working setup. In about half an hour you'll have Harness running with a model you chose, a plugin marketplace installed, and a skill you already use in Codex working inside it. You'll also see where it still loses to Claude Code.
What DeepSeek Harness is and how it differs from Claude Code
DeepSeek Harness is an environment for running a coding agent. You open a project folder, describe the task in chat, give the agent access to files and review what it produces.
On the surface, that's the same loop you know from Claude Code or Codex. DeepSeek shipped version 0.1 on August 13, 2026, and labeled it a developer preview. So expect the interface and commands to keep moving.
Two things set it apart.
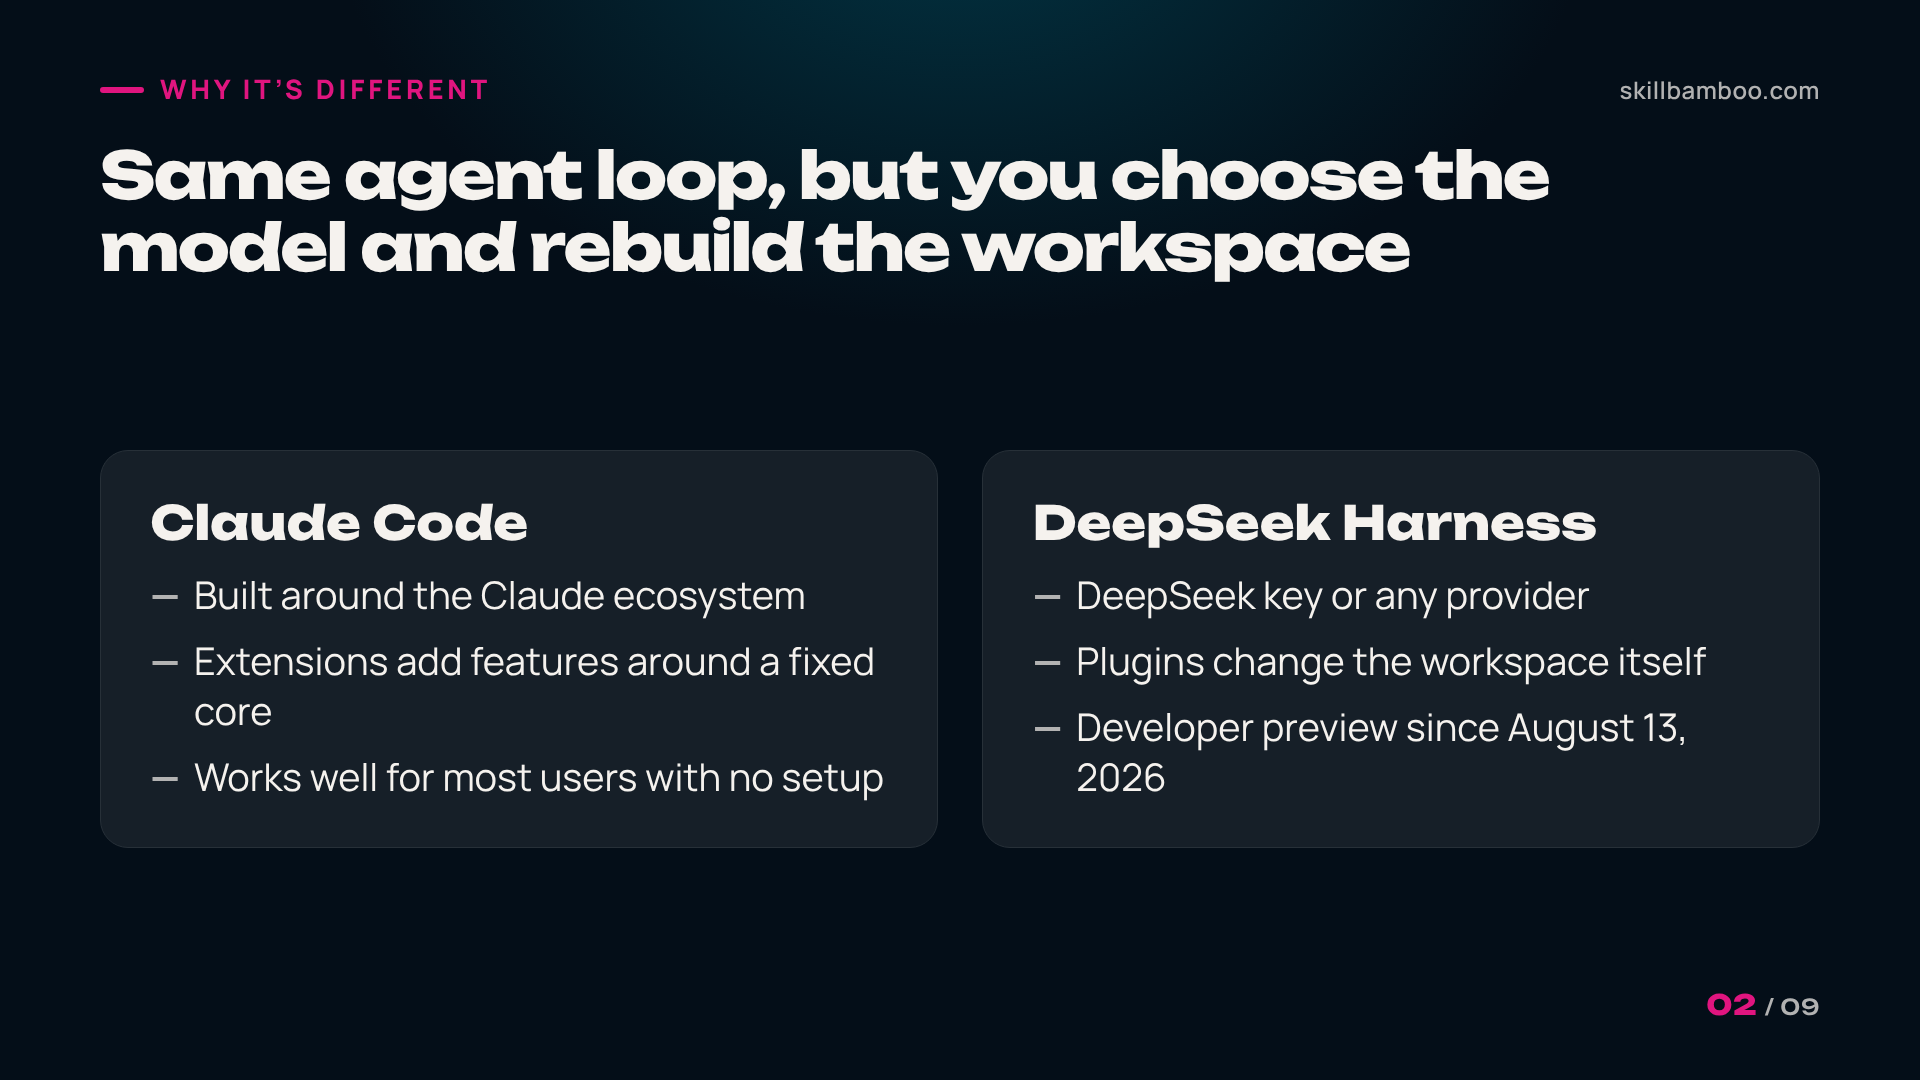
The model is your choice. Codex leans on OpenAI's models, and Claude Code is built around the Claude ecosystem. Harness isn't bound to DeepSeek's models. A DeepSeek API key is just one option, and you plug in other providers the same way.
Plugins are the core, not an add-on. In most agents, extensions bolt features onto a fixed core. In Harness, plugins sit at the center of the system and decide what the workspace looks like and what the agent can do. Think of it as a construction kit rather than a finished app.
Install DeepSeek Harness: desktop app or one npx command
You have two ways to install it:
- Desktop app. Go to the official site, pick your operating system and download the app.
- Terminal. Run Harness from the command line, and it opens as a web app in your browser.
DeepSeek Harness – Official page with desktop downloads for macOS and Windows
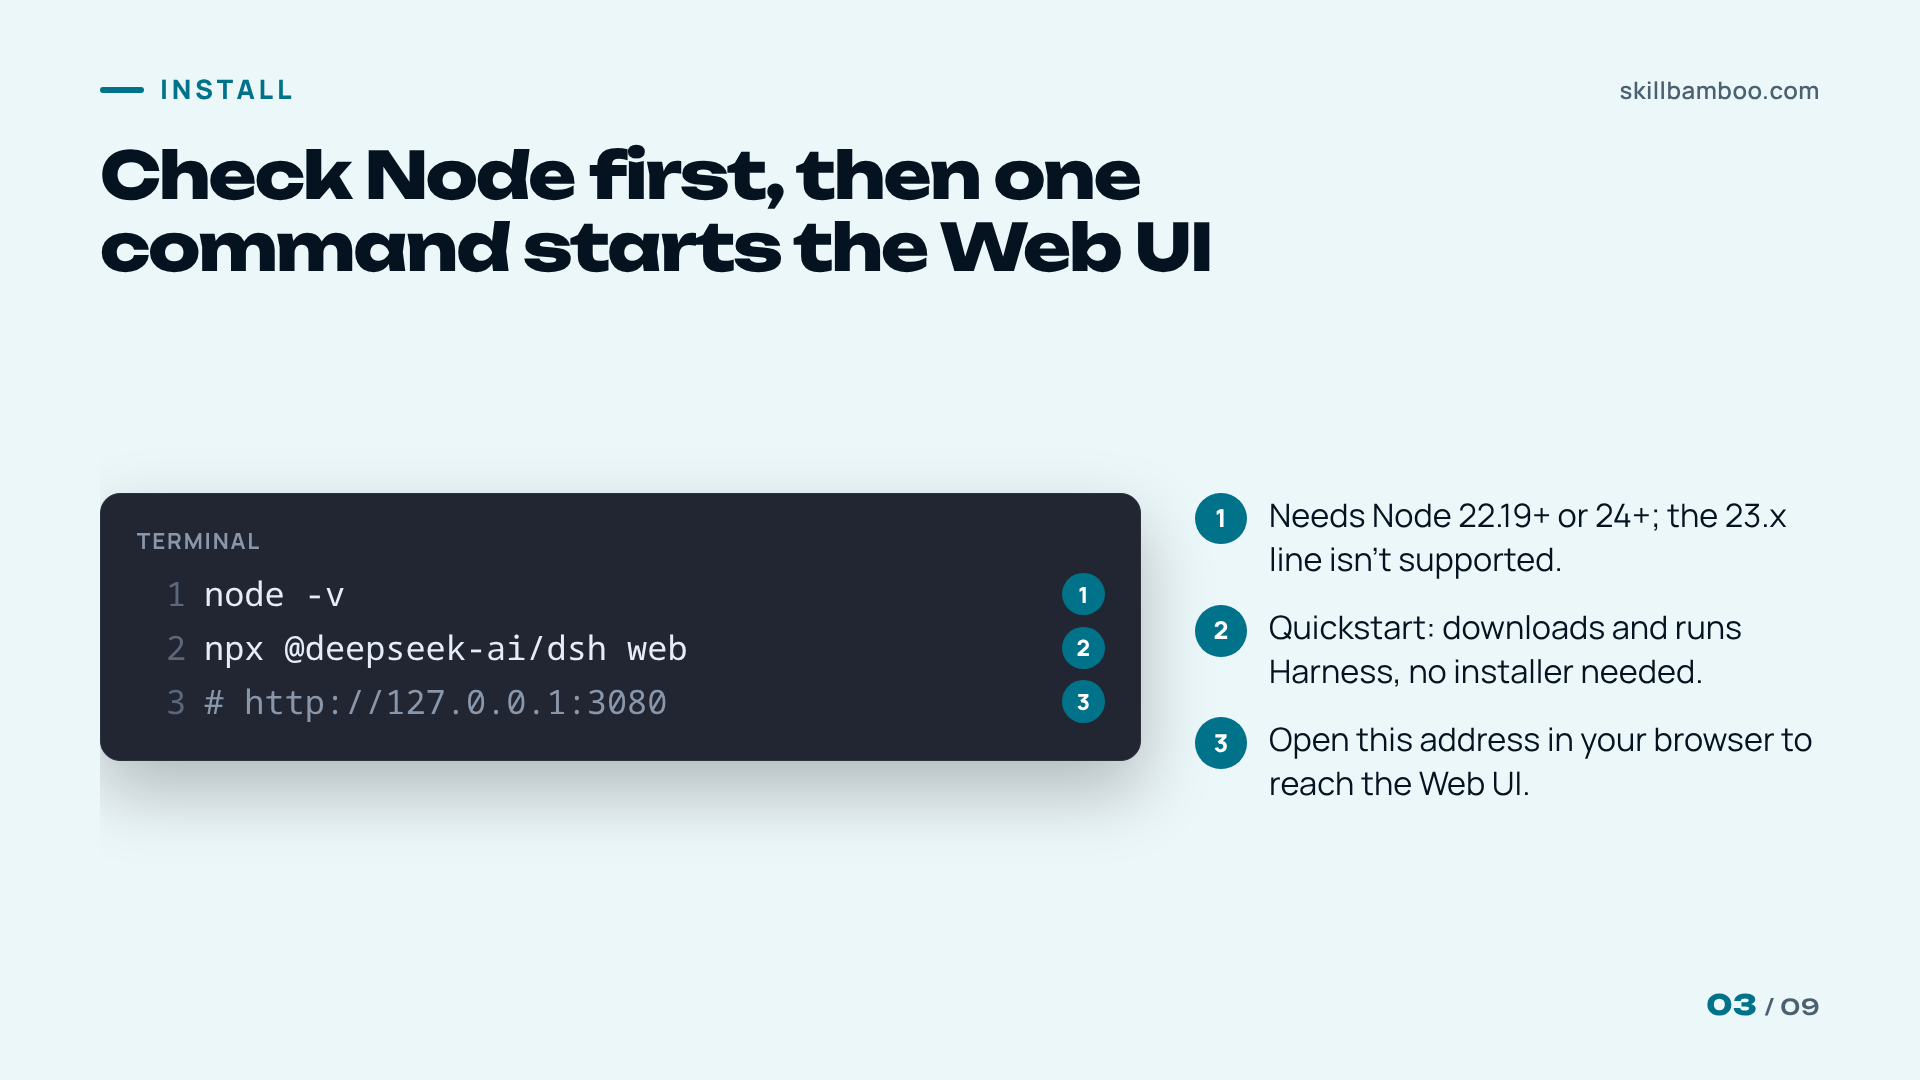
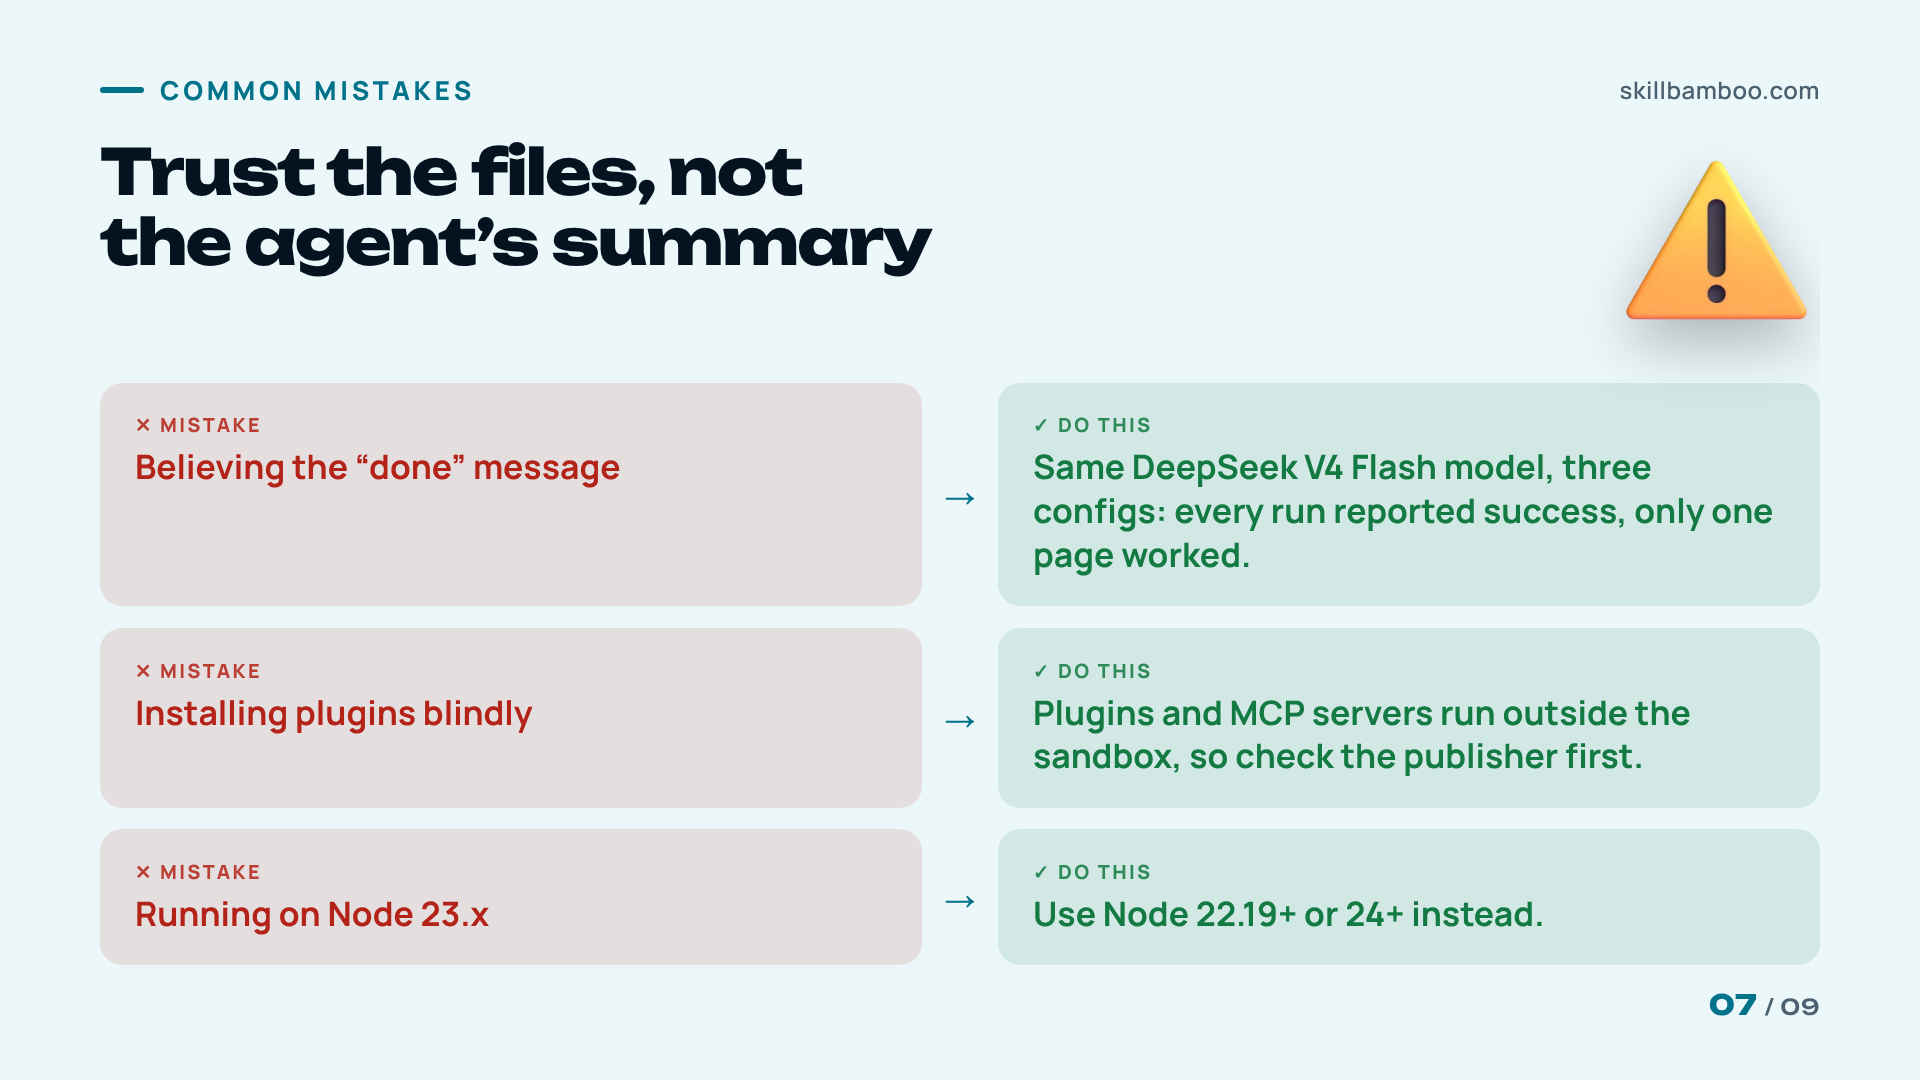
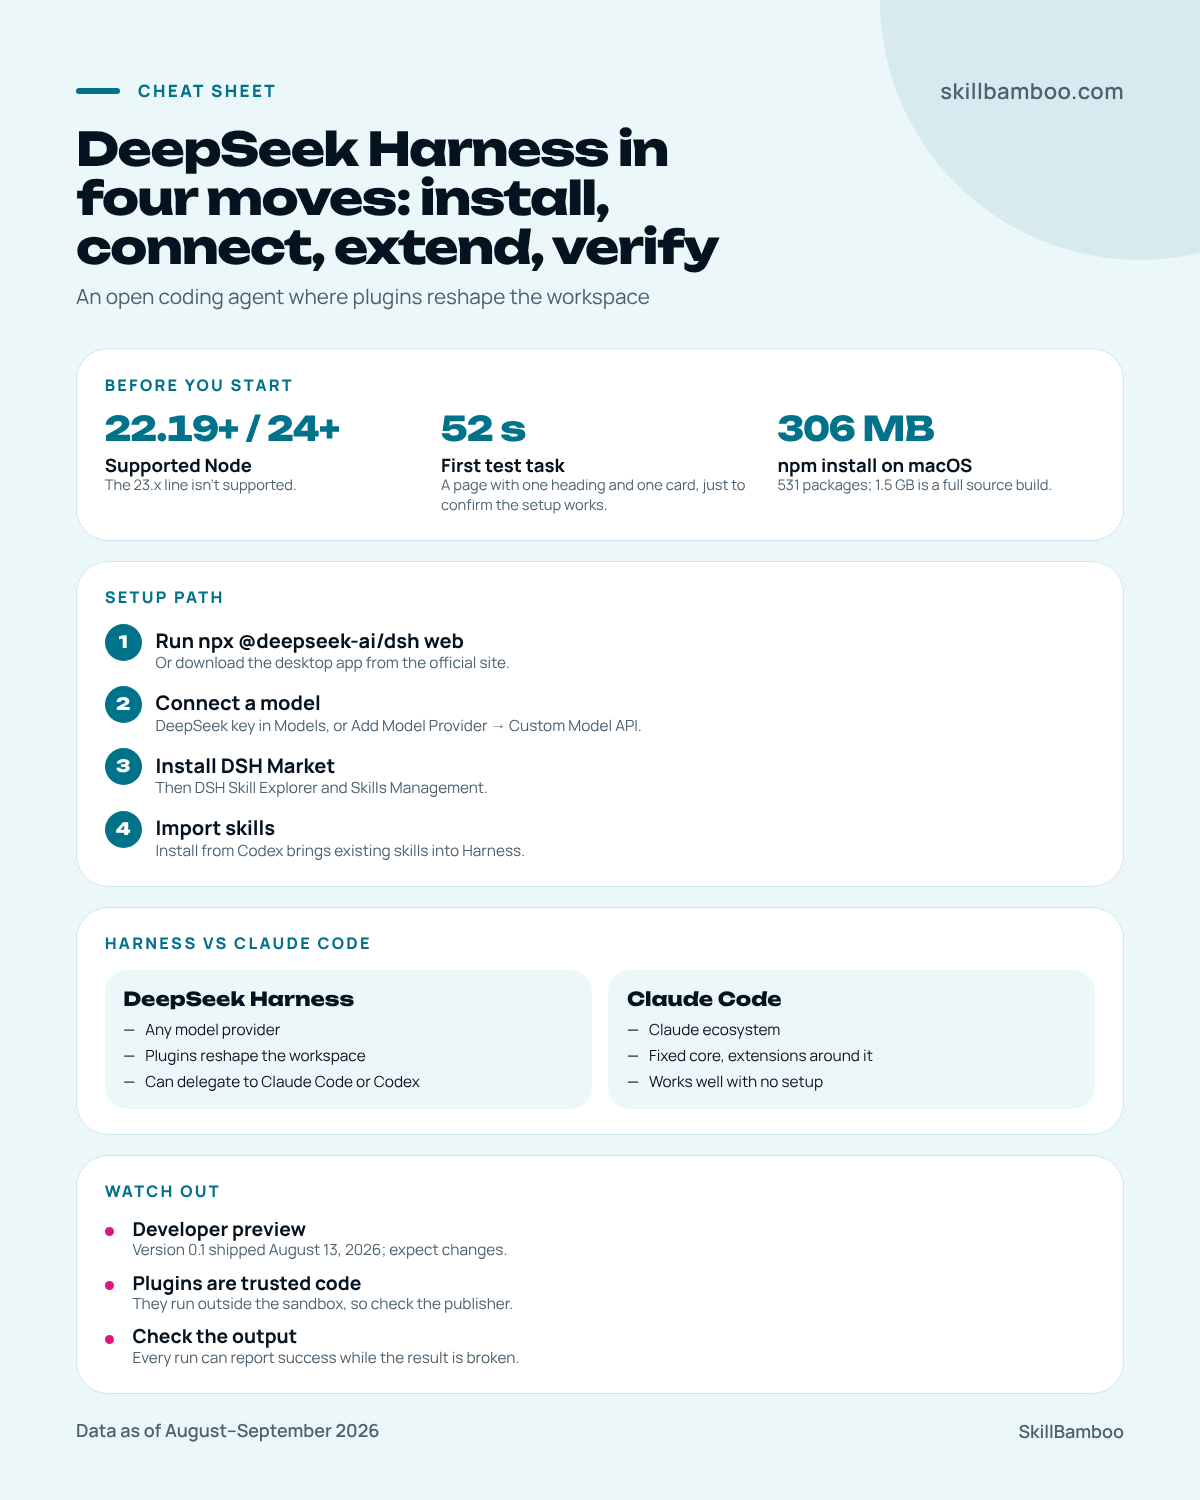
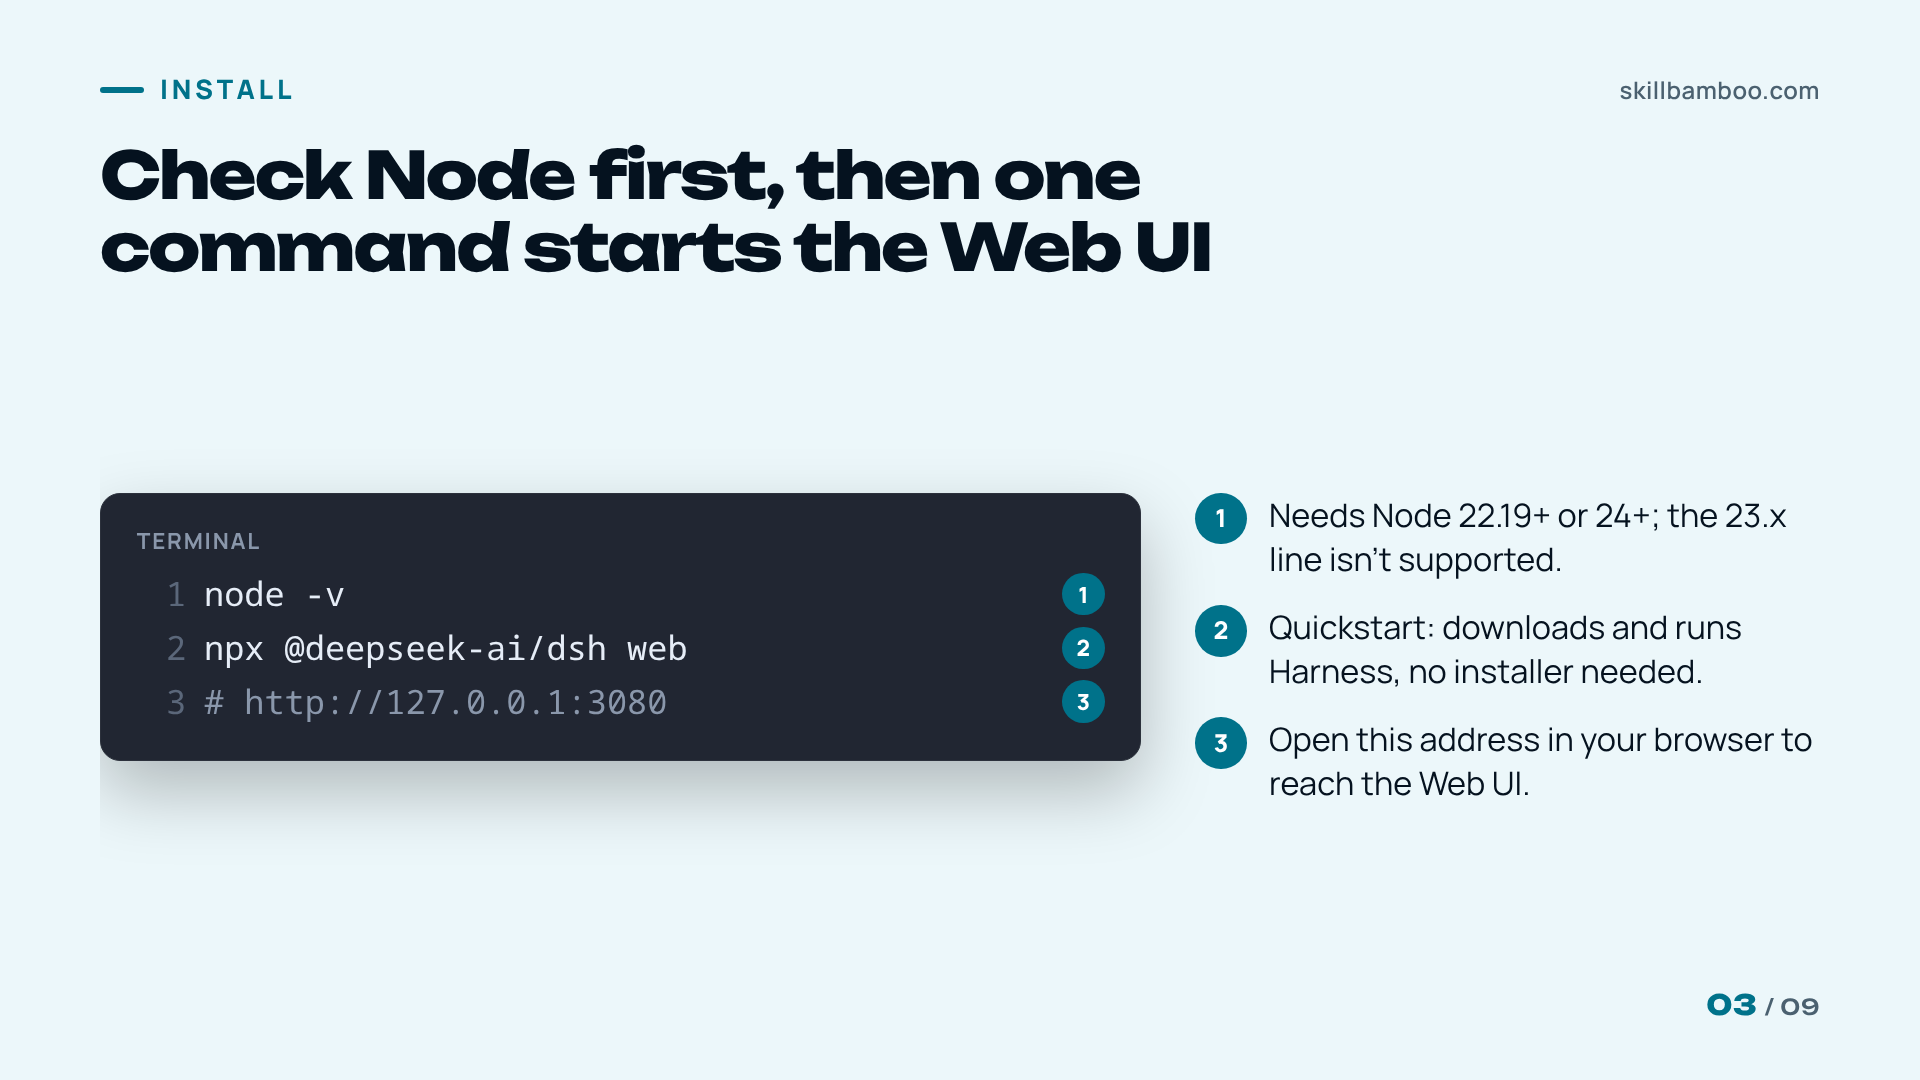
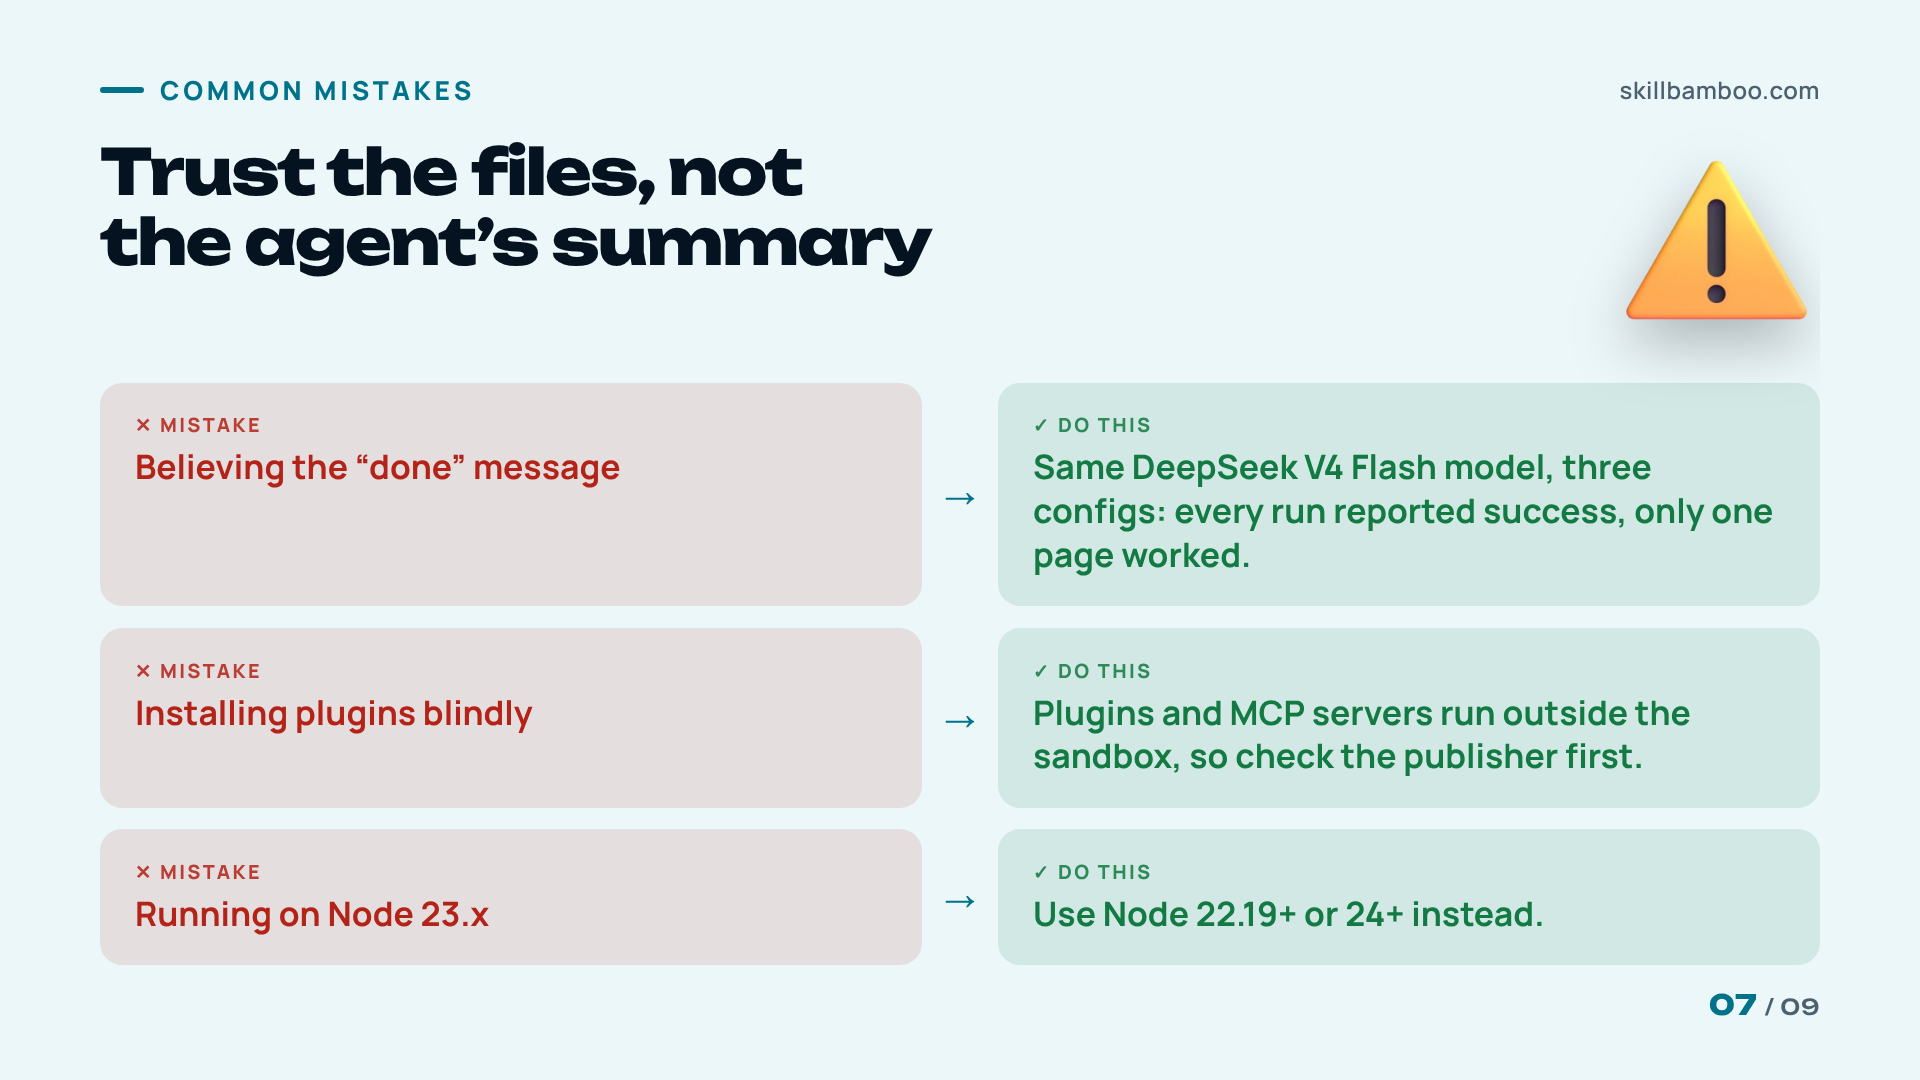
If you take the terminal route, sort out the DeepSeek Harness Node version first. Harness needs Node 22.19 or newer on the 22 line, or Node 24 and up. The 23.x line isn't supported – and a lot of setup guides get this wrong.
With the right Node in place, the quickstart is a single command:
npx @deepseek-ai/dsh web
It serves the Web UI at http://127.0.0.1:3080. The download isn't small either: a single npm install on macOS pulled in 531 packages and 306 MB. (The 1.5 GB figure that circulates refers to a full source build, not to this install.)
deepseek-ai/deepseek-harness on GitHub – Official README with quickstart command and Web UI address
Once it's running, Harness already works with code, skills and MCP (a way to give the agent tools from outside services), with no extra setup. Create an empty folder for testing and open it as your project, so a first mistake can't touch real code. Then move on to the model.
Node version first
If the install misbehaves, run node -v before anything else. You need ^22.19.0 or >=24; 23.x isn't supported, and a lot of setup guides miss that.
Connect a custom model: a DeepSeek key, OpenRouter or any provider via Custom Model API
The quickest path is DeepSeek itself: open the Models tab and paste a DeepSeek API key.
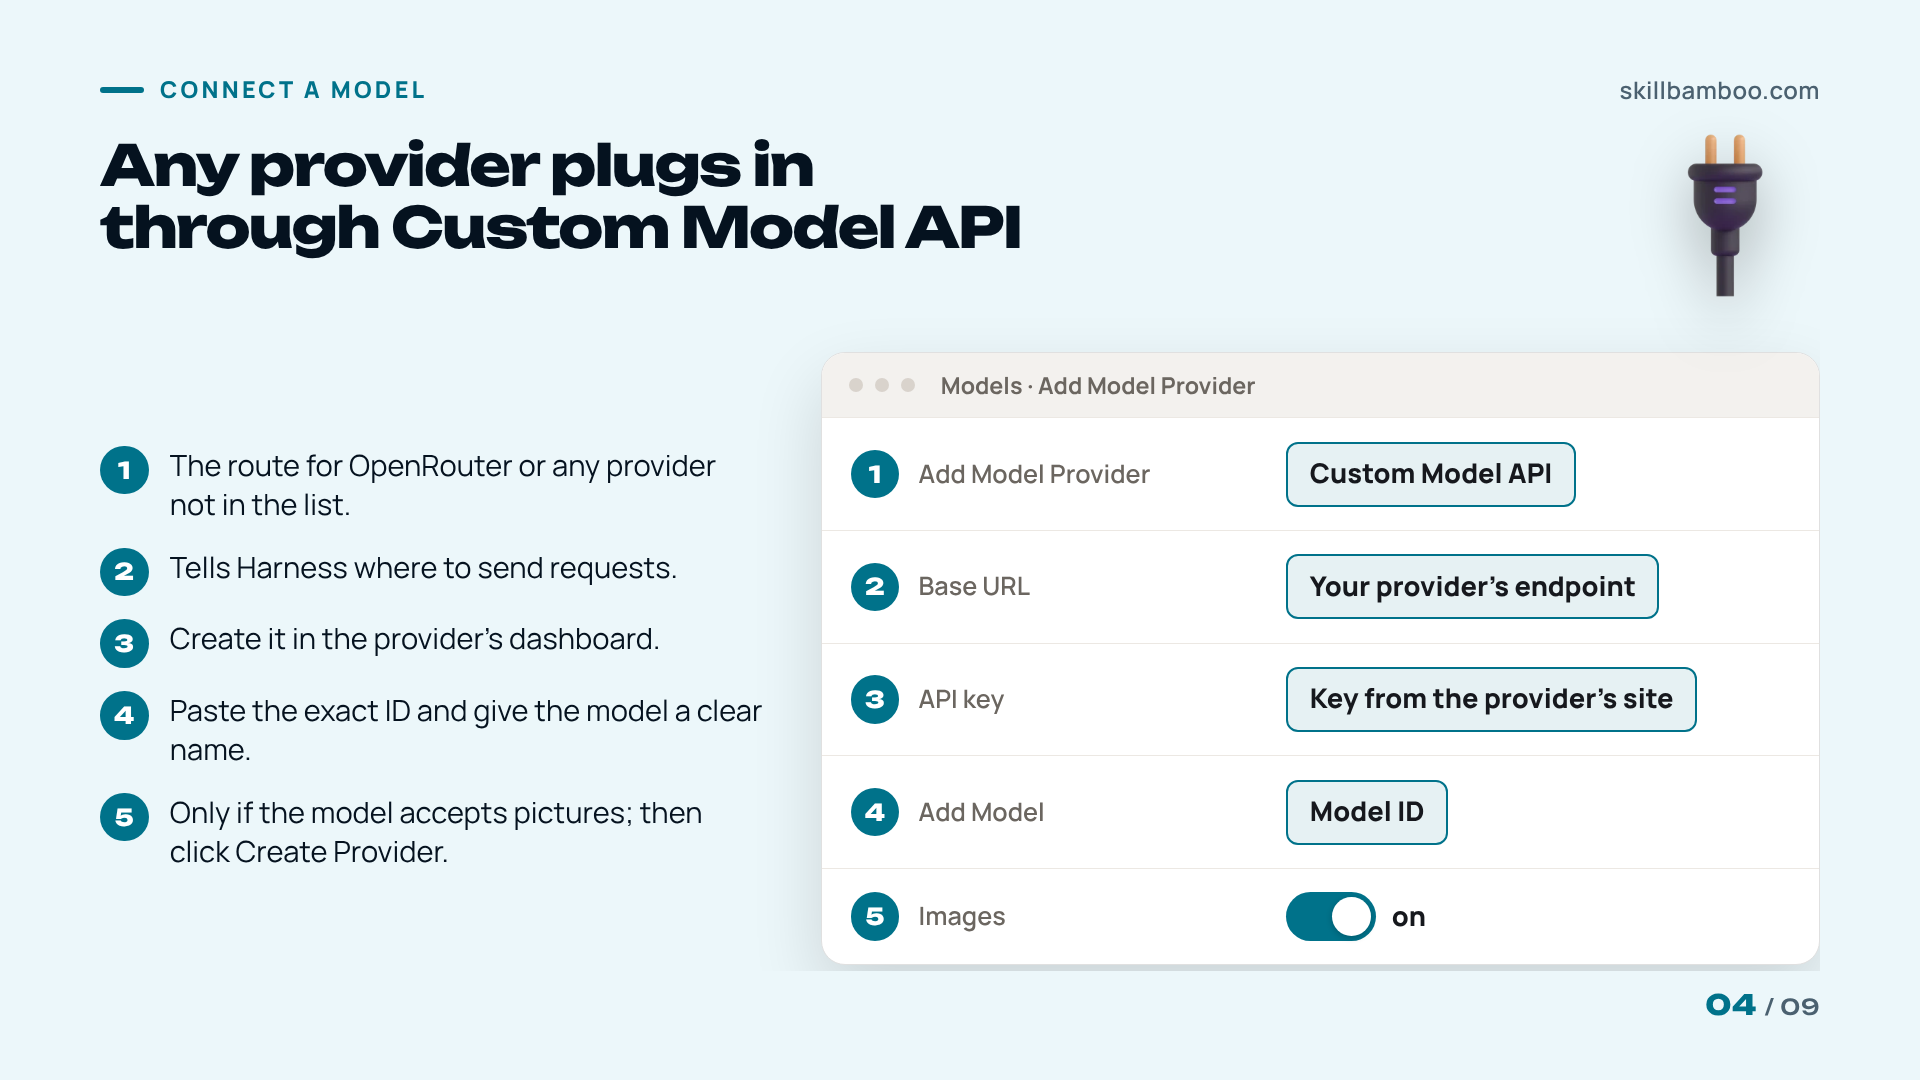
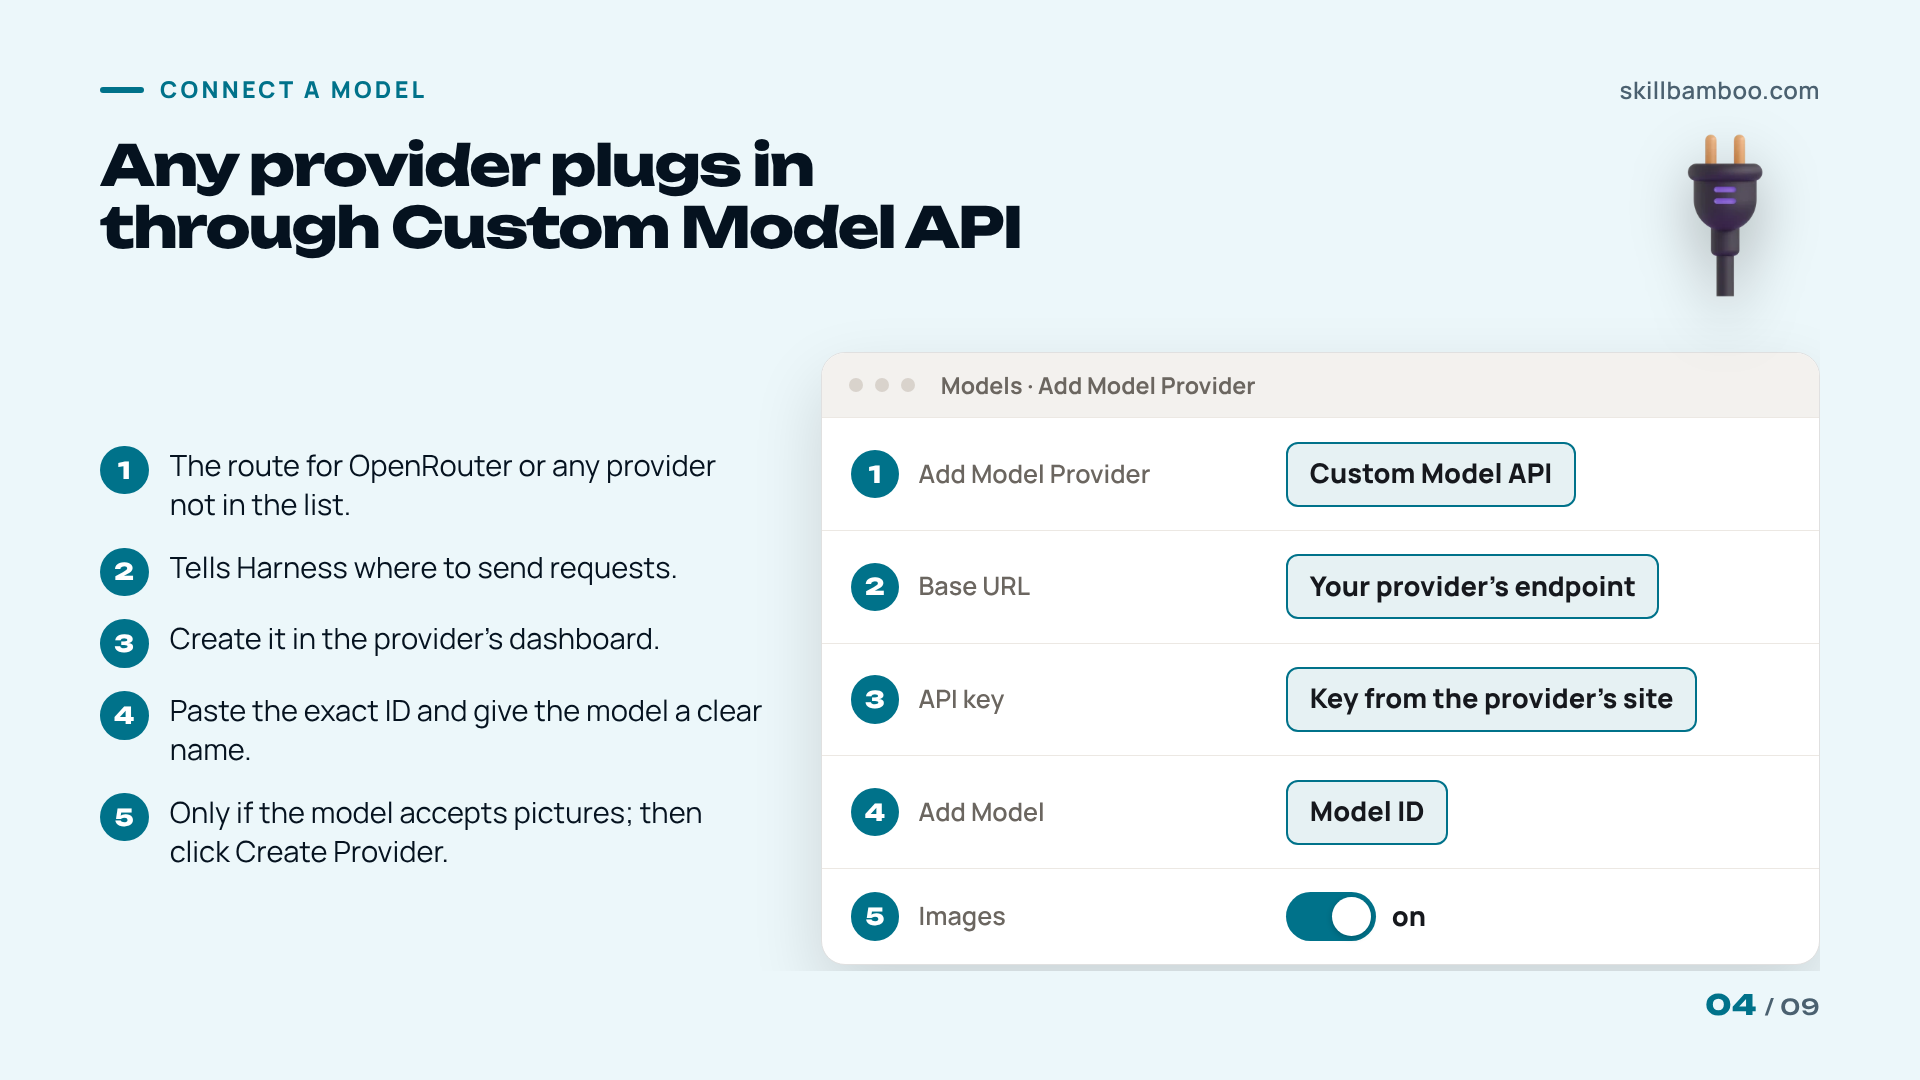
If you want a different provider, OpenRouter for example, use the custom route:
- Click Add Model Provider and choose Custom Model API.
- Enter the provider's Base URL and an API key you created on the provider's site.
- Click Add Model and paste the ID of the model you want.
- If the model accepts images, tick the checkbox that lets you send pictures to it in chat.
- Click Create Provider.
Now go back to the main screen, select the new model and send a deliberately trivial task. In one test run, a page with a single heading and one card in an empty folder took the model 52 seconds.
That's not a benchmark, it just proves the agent can create files and the result actually opens.
Two YAML settings that cut cost, not bugs
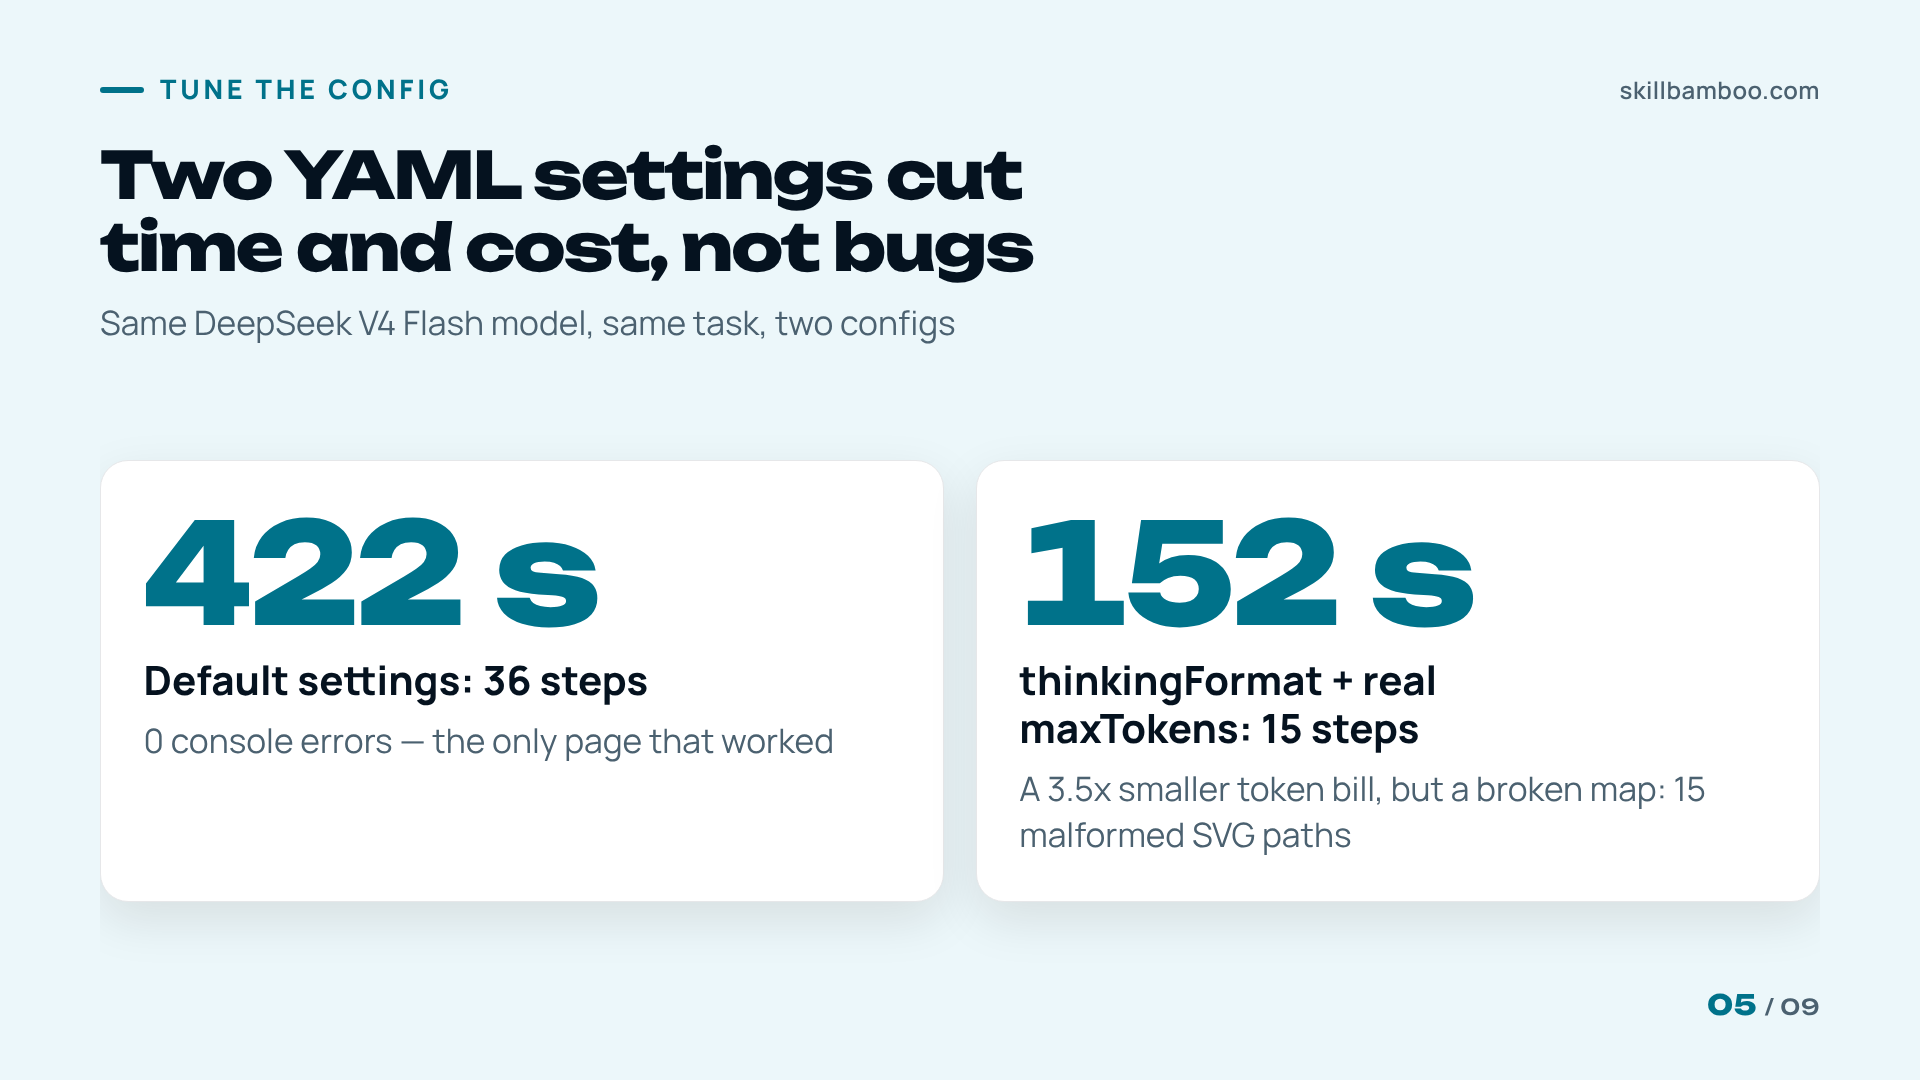
If a DeepSeek model sits behind an OpenAI-compatible endpoint whose URL doesn't give it away, Harness can guess the wrong reasoning dialect. In one test with DeepSeek V4 Flash, adding compat.thinkingFormat: deepseek and a real maxTokens to $DSH_HOME/settings.yaml (default ~/.dsh/settings.yaml) cut the same task from 36 steps and 422 seconds to 15 steps and 152 seconds, and the token bill by 3.5x. But the tuned page still came out broken, and the slow default run was the only one that worked: this fixes cost, not correctness. compat.* works only under api: openai-completions.
Install your first DeepSeek Harness plugins with DSH Market
Plugins aren't skills, and they aren't MCP servers either. They work one level up: a plugin can, for example, add a panel for managing your skills or the MCP servers you've connected.
More broadly, a plugin can add a button, a panel, a theme, a new tool for the agent or a new way of working with a model. Here's a sensible first set:
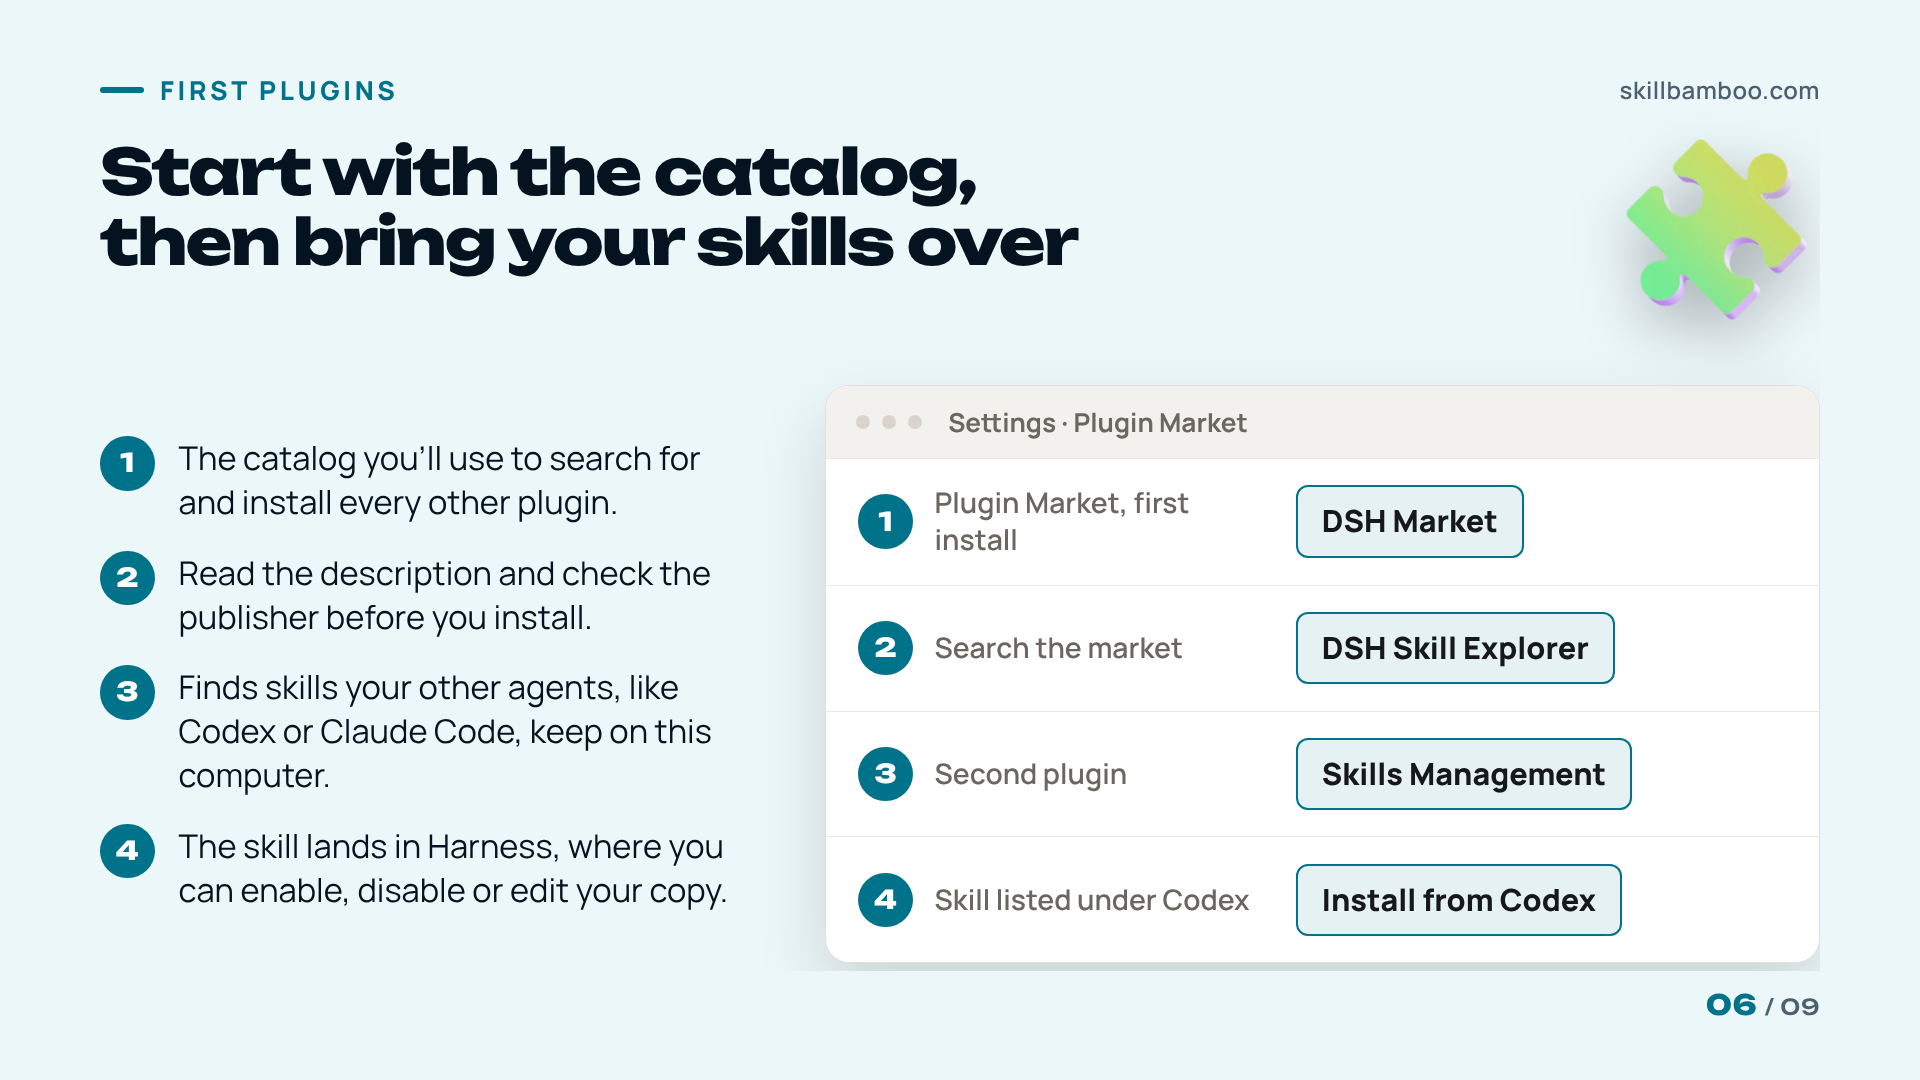
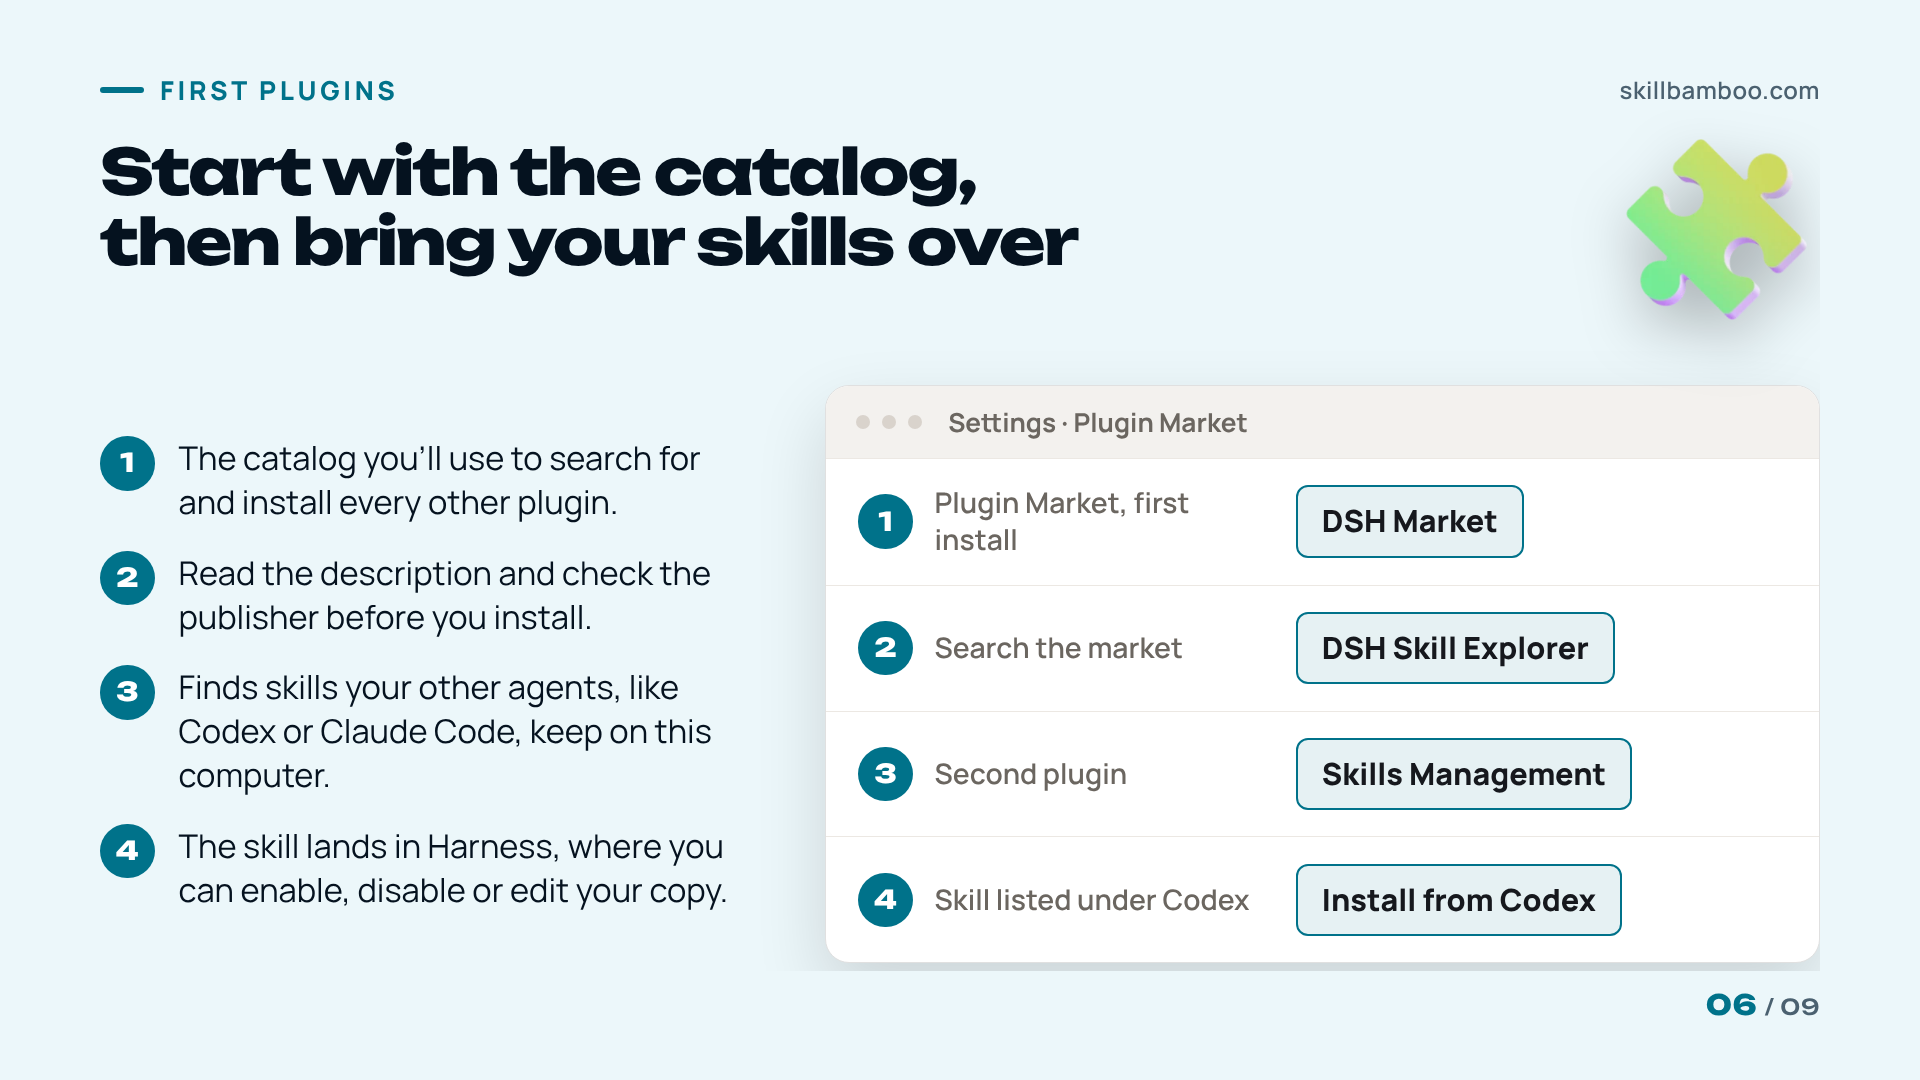
- Open Settings→Plugin Market. Harness suggests DSH Market right away. Install it, then restart Harness: it's the catalog you'll use to find and install every other plugin.
- Search for DSH Skill Explorer. Before you install it, read the description and look at who published it. If both look right, go ahead.
- Install Skills Management as well. This is the plugin that finds skills belonging to your other agents, such as Codex or Claude Code.
After that, the market becomes your toolbox. You search by name or purpose and add only what your work needs – instead of living with one fixed set of features chosen for everyone.
Every plugin is code you trust
Neither plugins nor MCP servers are confined to the sandbox that wraps the agent's shell commands. Adding a plugin means you trust its code, so looking at the publisher and the description first is a real safety step, not a formality.
Bring your skills over from Codex or Claude Code
If you've already built skills for Codex, it isn't worth recreating them. With Skills Management installed, Harness lists the skills your other agents keep on this computer, including those from Codex and Claude Code.
To move one over, open a skill listed under Codex and click Install from Codex. The skill becomes available in Harness, and from then on you manage your own copy there: switch it on, switch it off or edit it.
To check the import, start a fresh chat in the same project, run a task with the imported skill attached, and compare the result with what a plain prompt produced earlier. If the skill carries real instructions, the difference should be obvious.
Upgrade the workspace: a better right-hand panel
This is where Harness stops looking like every other agent. Install a right-hand panel plugin from the market, and that panel gains three things it didn't have: a view of the changes the agent has made, a way to create tasks for the agent, and an extra chat.
The same logic applies to the rest of the interface. Because a plugin can add a button, a panel, a theme or a new tool for the agent, you assemble the workspace from parts instead of accepting a fixed layout.
A different look is a theme plugin away. A capability the agent lacks is a tool plugin away. In other words, a plugin can change what you see, what the agent can do, or both – without you editing any source code.
DeepSeek Harness vs Claude Code: where it wins and where it falls short
Here's how the two compare on the points that matter when you're deciding whether to switch:
| DeepSeek Harness | Claude Code | |
|---|---|---|
| Models | DeepSeek key or any provider via Custom Model API | Built around the Claude ecosystem |
| How it extends | Plugins change the workspace itself | Extensions add features around a fixed core |
| Out of the box | Developer preview since August 13, 2026: does less out of the box, expect to configure it | Works well for most users with no setup |
Where Harness wins. Flexibility. You pick the model, you shape the workspace, and you can even hand part of the job to Claude Code or Codex, running underneath as sub-agents. If you already pay for one of them, Harness can become the layer on top rather than a replacement.
Where it falls short. Before any configuration, Harness does less than its two better-known rivals, which work well for most people straight away, and early testers call it rough around the edges.
Check the agent's own reports, too. In one test, the same DeepSeek V4 Flash model ran one task three times with three provider configs: every run reported success, but only one page loaded without console errors. Claude Code wasn't part of that test, and it isn't a Harness bug as such: the agent made the mistakes and Harness reported them as done. Judge the result by its files, not by the closing summary.
Harness rewards people who want control and don't mind checking its work, because plugins and the agent's own reports both need a second look.
Key terms
- Agent harness – The environment around a model that gives a coding agent its tools, files, sessions and interface.
- Plugin (in DeepSeek Harness) – A swappable component that can add a button, panel, theme, agent tool or model route to Harness.
- Skill – A set of instructions and materials that tells the agent how to handle a specific kind of task.
- MCP – A way to give the agent tools from an external service, such as access to your notes app.
- Custom Model API – A Harness option for connecting any OpenAI-compatible provider by its base URL, API key and model ID.
- Developer preview – An early release meant for testing, where breaking changes are expected.
Bottom line
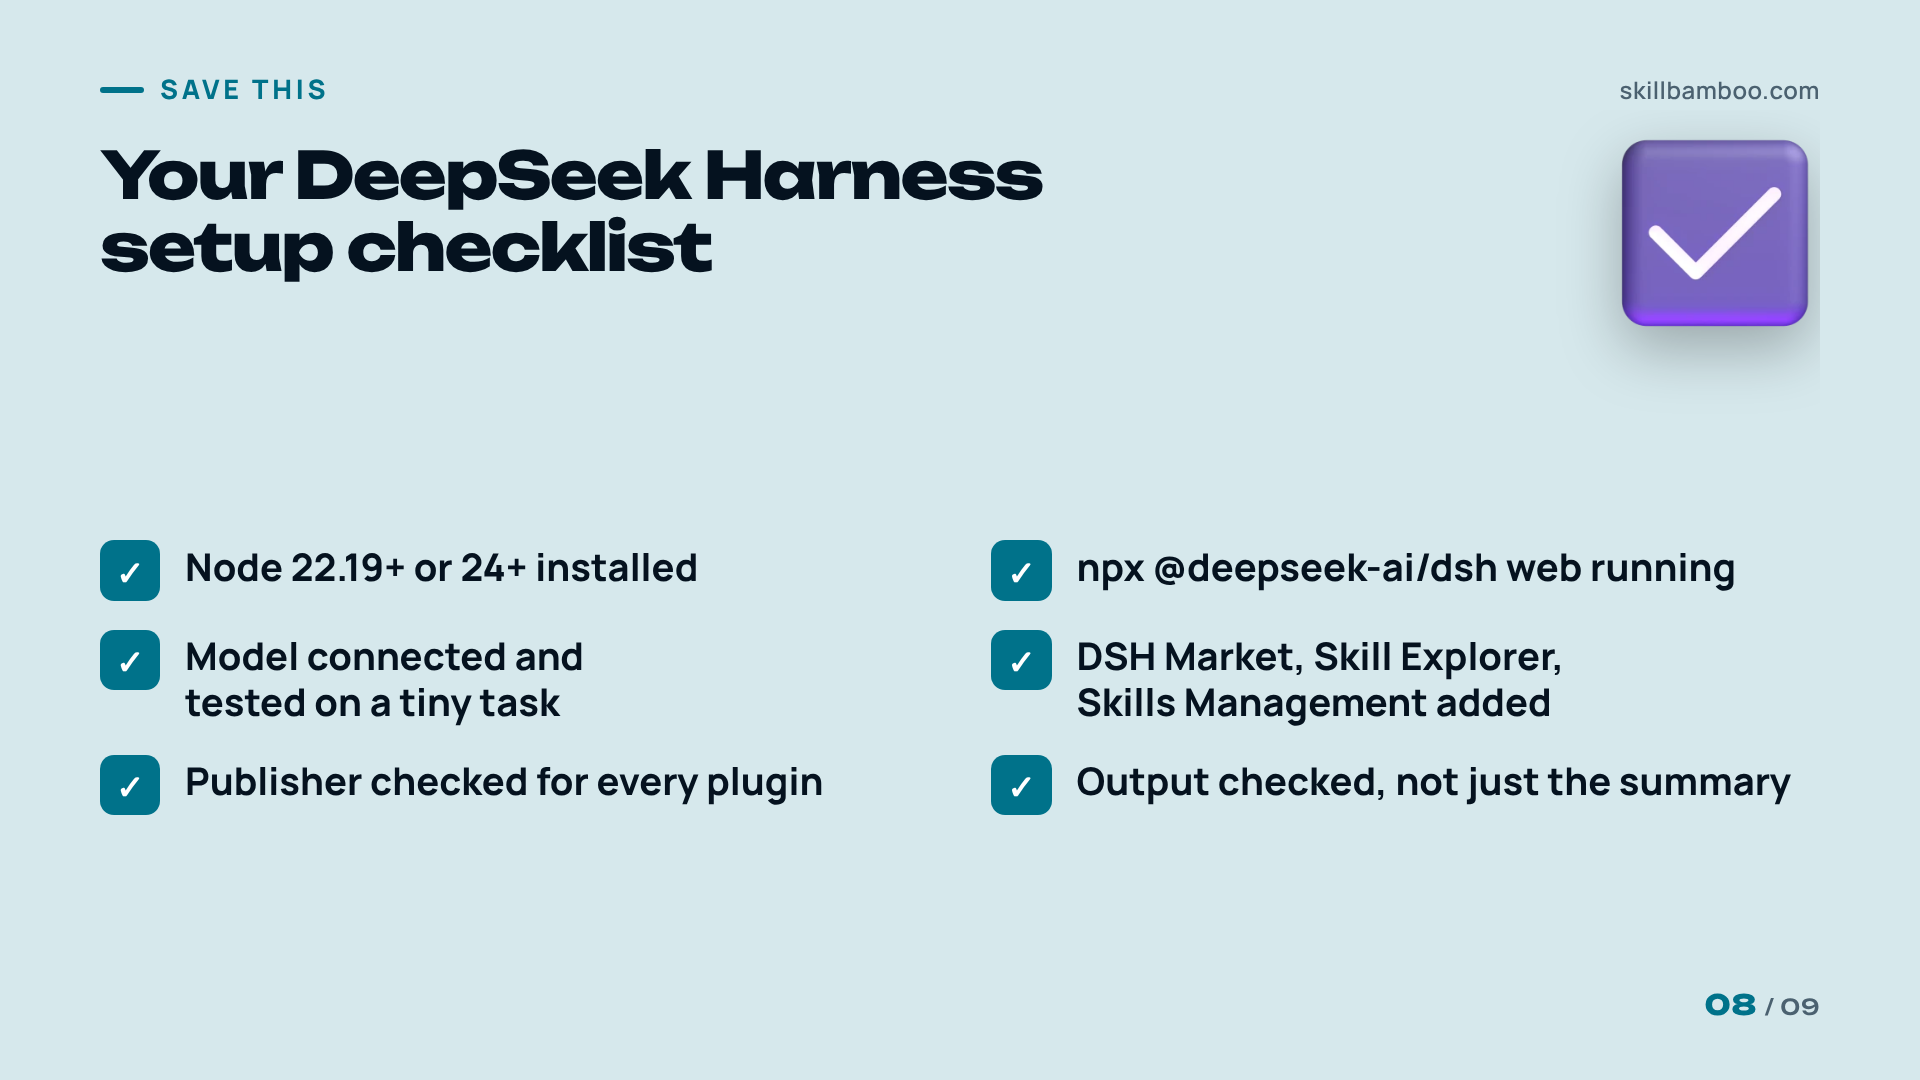
You now have Harness on a supported Node version, a model connected through a DeepSeek key or Custom Model API, DSH Market with your first plugins, and at least one Codex skill working in a new home. That's a complete personal coding agent, built from parts you chose.
Who should set it up now
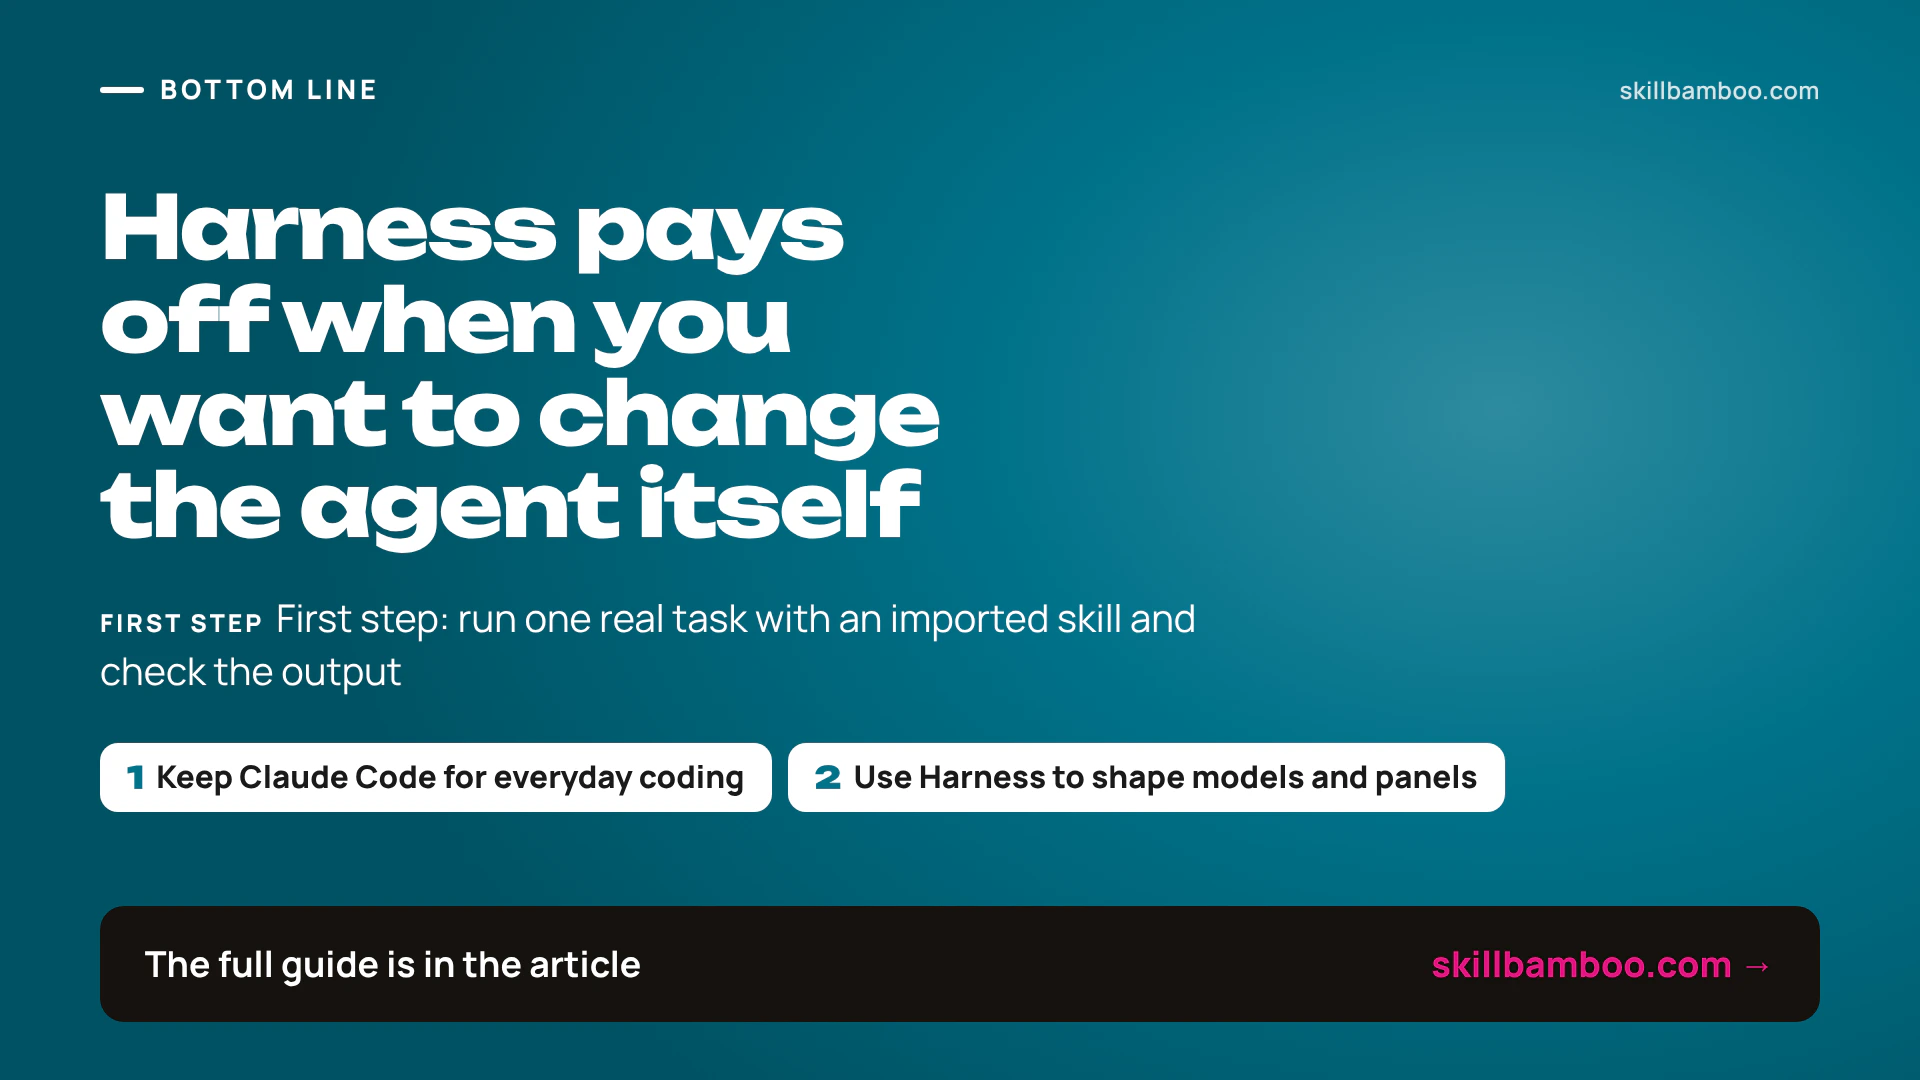
Harness is the right pick if what you actually want to modify is the agent runtime itself: models, tools, panels, workflow. For dependable everyday coding, it isn't the default choice yet. Keep Claude Code or Codex for that, and run Harness alongside them.
Next step: pick one real task from your week, run it in Harness with an imported skill, and check the output yourself before you trust the result.
Check yourself
1. You want to run Harness with a model from OpenRouter rather than DeepSeek. What do you do?
- A. Install a separate fork of Harness for OpenRouter
- B. Add a provider via Add Model Provider → Custom Model API with the Base URL, API key and model ID
- C. Nothing – Harness only works with DeepSeek models
Show answer
Answer: B. Harness isn't tied to DeepSeek models; any provider can be added as a custom model API.
2. Your Node version is 23.x and Harness won't start. What's the fix?
- A. Switch to Node 22.19+ or 24+
- B. Downgrade to Node 20
- C. Reinstall with a full source build
Show answer
Answer: A. The 23.x line isn't supported.
3. The agent says the task is done and lists everything it verified. What should you do?
- A. Trust the summary – the agent checked its own work
- B. Open the result and check it yourself
- C. Rerun the task with a faster config
Show answer
Answer: B. In one test with a DeepSeek model, all three runs reported success, but only one produced a working page.
4. What is the main difference between a Harness plugin and a skill?
- A. They are the same thing under different names
- B. A skill gives the agent access to an external service
- C. A plugin can change the app and the agent's abilities, such as adding a panel; a skill is instructions for a specific task
Show answer
Answer: C. Plugins sit at the core of the system and can reshape the workspace, while skills only guide the agent.
5. Before installing a community plugin, what is the sensible precaution?
- A. None – plugins run in the sandbox
- B. Install everything in the market at once to compare
- C. Check its description, author and source
Show answer
Answer: C. Plugins run outside the sandbox, so installing one means trusting its code.